OBS Studio Review: Rating, Features, Pros, Cons & Pricing 2024
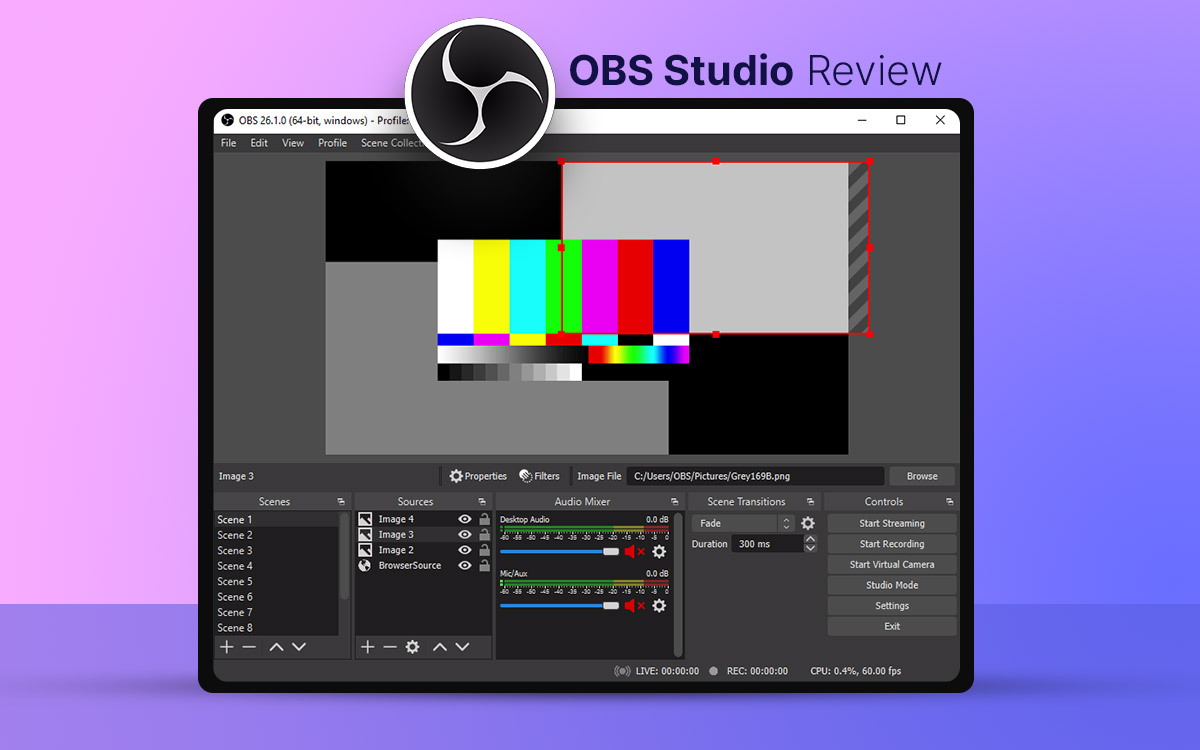
OBS Studio is a quick and simple way to capture screen activities on Windows, immaterial of your video recording or broadcasting need. This OBS Studio review will find out why it is widely regarded as one of the best broadcasting tools.
What Is OBS Studio Screen Recorder?
OBS Studio stands for Open Broadcaster Software, considered one of the best broadcasting software. It is free and open source and allows you to record screens from multiple sources with no restriction on time. As far as the impact on a computer’s resources is concerned, it doesn’t consume much of your computer’s resources.
OBS Studio began as a small project created by Hugh “Jim” Bailey, but it soon gained ground, and the first version was released in August 2012. In 2013, OBS was later renamed OBS Studio, which is more powerful and supports multiple platforms.
Pros:
Excellent screen recording software with audio.
Effortlessly manage all your content.
Highly compatible with popular platforms like FB Live, Twitch & more.
Intuitive audio mixer
Several transitions to choose between scenes
Cons:
No “pause” function for recording
Intricate interface with some learning curve involved
Why Should You Choose OBS Studio?
With a large number of screen recording software available, why choose OBS studio? First, it is available free of cost. All you need to do is go to the website and install it. OBS Studio is hailed as the first choice for content creators who don’t want to invest heavily in a screen capture utility. Secondly, unlike free screen recording software, OBS doesn’t force you to put watermarks on your screen recordings. OBS Studio also offers extensive plugin support, with the help of which you can create more professional screen recordings.
Languages Supported: Over 59, including English, French, Finnish, Chinese, German, Chinese, Japanese, Portuguese, Korean, Russian, and many others.
Screenshot Support
Fullscreen
Scrolling Screenshot
Selected Region
Single Windows
Recording Supports
Full screen with taskbar
Full screen without taskbar
Scrolling Screenshot
Selected Region
Single Windows
Capture Image Editing tools
Add pointers
Add Steps
Add Text
Blur & Pixelate
Color Picker
Crop
Draw
Highlight
Mark
Undo button
Storage Support
Dropbox
Google Drive
OneDrive
Interface
75% - Good
The user interface can be segregated into scenes, sources, audio mixers, scene transitions, and controls. After you have installed OBS Studio, you will first see a blank screen that can further be changed to various sources such as a display, gaming screen, browser, etc. OBS Studio also offers a Studio Mode where you can preview and stage elements before pushing them live to your audience.
At first glance, and especially if you are new to the concept of screen recording, OBS studio doesn't come across as very user-friendly. We are not saying that beginners shouldn't give OBS Studio a try; however, you can try the likes of TweakShot Screen Recorder,Icecream Screen Recorder for an easier interface. It may take some time to get the hang of functions, so it has a slight learning curve compared to various other screen capture tools. But, once you start working and getting used to the functionalities, you'll find that OBS Studio is one of the most meticulous broadcasting software.
Features
85% - Very Good
1. Capture Screen In HD
OBS is one of those screen recording utilities that lets you capture the activities on your screen in HD, and you can further stream it in HD. Furthermore, apart from Window captures, you can include elements such as images, webcams, text, capture cards, and many more.
On the flip side, while the utility gives you several options to capture the screen, you would find it hard to capture specific areas of the screen, such as an active window or a selected region, especially if there is an area of the screen that you want to be covered.
2. Audio Mixer
The screen recording utility has an intuitive audio mixer loaded with pre-source filters such as noise suppression, gain, and noise gate. You can even use the VST plugin support to your advantage. This is not it. There are several other options as well.
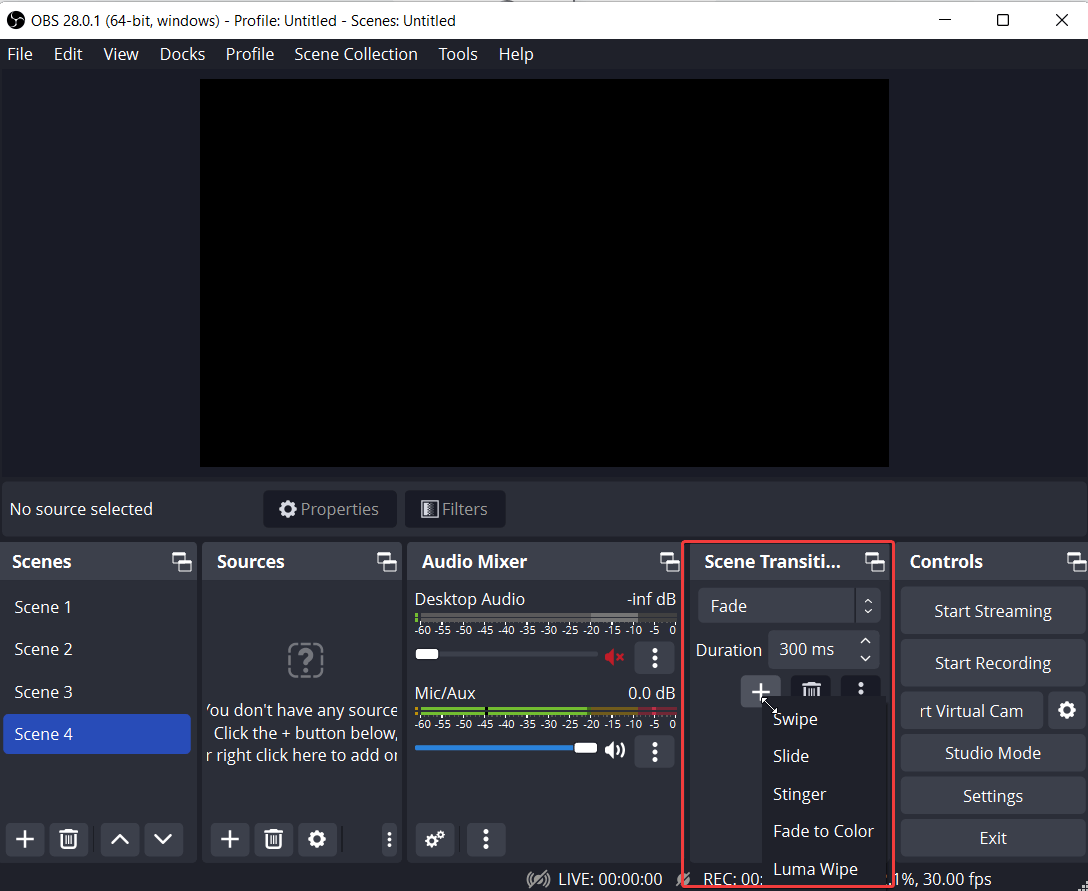
3. Set Up Unlimited Scenes
OBS Screen recorder lets you set up unlimited scenes. This enables to switch between scenes seamlessly. You can choose from a variety of transitions when switching between scenes. These include Fade, Cut, Swipe, Slide, Stinger, Fade to Color, and Luma Wipe.
4. Easy Yet Powerful Configuration
OBS Studio lets you have a complete grip over the sources' configuration options for every source you choose - be it your webcam, browser, active window, microphone, or any other source. You can easily adjust the configuration settings for each source you have added.
5. Multiview
With OBS Studio for Windows 11, you get the Multiview feature that helps you process several scenes so that transitioning between the scenes becomes hassle-free and smooth. You can monitor 8 different scenes simultaneously with a single or double click.
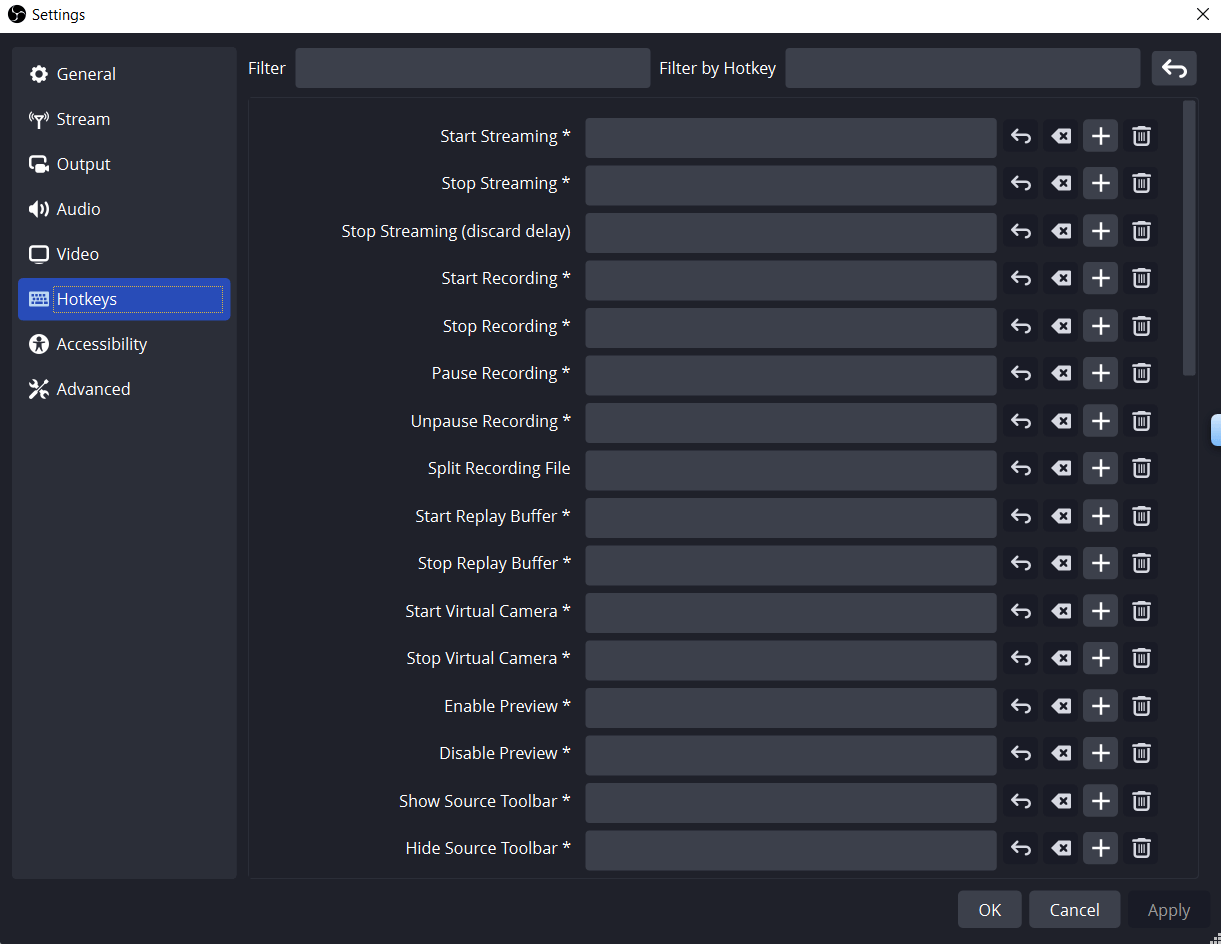
6. Set Hotkeys As Per Your Convenience
OBS Studio has almost no function that you cannot operate via a hotkey. And, you have the complete freedom of setting up hotkeys to juggle between various functions efficiently.
7. Studio Mode
This feature can be handy if you frequently conduct live streaming sessions, as it can give a more professional look to your live streams. The Studio Mode helps you stage the elements before you go live with these elements while you are broadcasting. These could be transitions, sources, or other elements. This way, you can save yourself from live streaming something you didn't intend to stream.
8. No Time Limit On Video Recording
OBS screen recorder for PC, unlike many other screen recording software, doesn't put a limit on the record time. If you intend to screen record for hours, you can do so without a hiccup.
Updates
85% - Very Good
OBS Studio comprises one of the most active developers who continuously roll out updates to fix bugs and improve functionality. Since its inception in 2012, OBS Studio has undergone various updates, something that not even the best in the business have. Fetching updates manually is effortless. All you need to do is click on the Help menu and then click on Check for Updates, as seen in the screenshot below.
Pricing
95% - Excellent
OBS Screen Recorder is open-source software that is available free of cost.
Customer Support
95% - Excellent
OBS Studio offers a variety of ways through which users can seek help in case of technical and other issues. You can visit the OBS Studio help page, where you can access guides that can help you with various functions of OBS Studio.
You can also chat with volunteer support members and OBS contributors and get your queries resolved. OBS Studio has a large community/ forum where you can post your feedback, discuss tools, etc. You can also install several great plugins and take your experience to the next level.
How To Install and Work With OBS Studio?
Let's see how you can start with OBS Studio for Windows once you have installed it on your computer. These steps can be helpful, especially if you have just begun working with the OBS Studio video recorder -
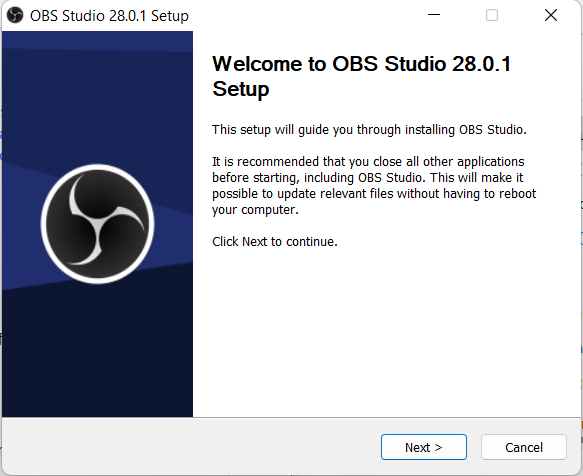
1. Download OBS Studio, install it, run the OBS studio installer, and click on Next.
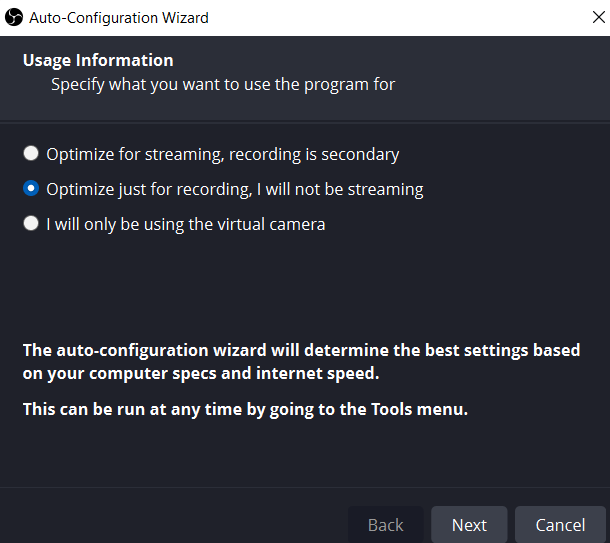
2. In the Auto-Configuration Wizard, specify how you want to use the program and click Next.
3. Set your audio - i.e., Desktop and Mic
4. Let’s get down to the bottom of the interface. First, you can set up multiple scenes by the activities you perform by clicking on the + - e.g., game streaming, capturing desktop activities, webinars, etc. The question arises, how do I capture the video?
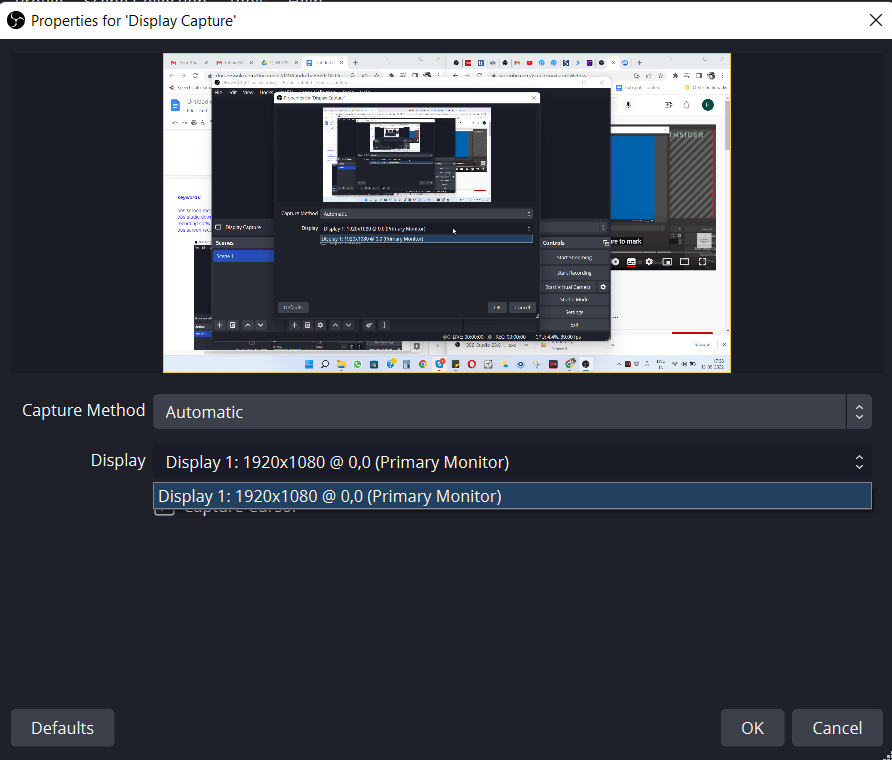
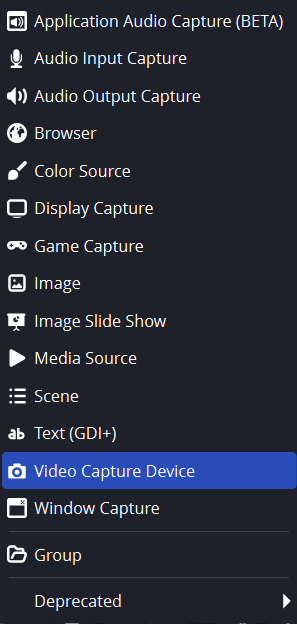
5. Next, we are going to set up a source. Head to the Sources section, click on the + button from the bottom and choose from the activities or elements shown in the screenshot below. You could choose to capture your webcam by clicking on Video Capture Device as shown in the screenshot below or record all the activities on your display by clicking the Display Capture option, and so on.
6. In the case of Display Capture, you can even switch between multiple monitors (in case you are using more than one screen).
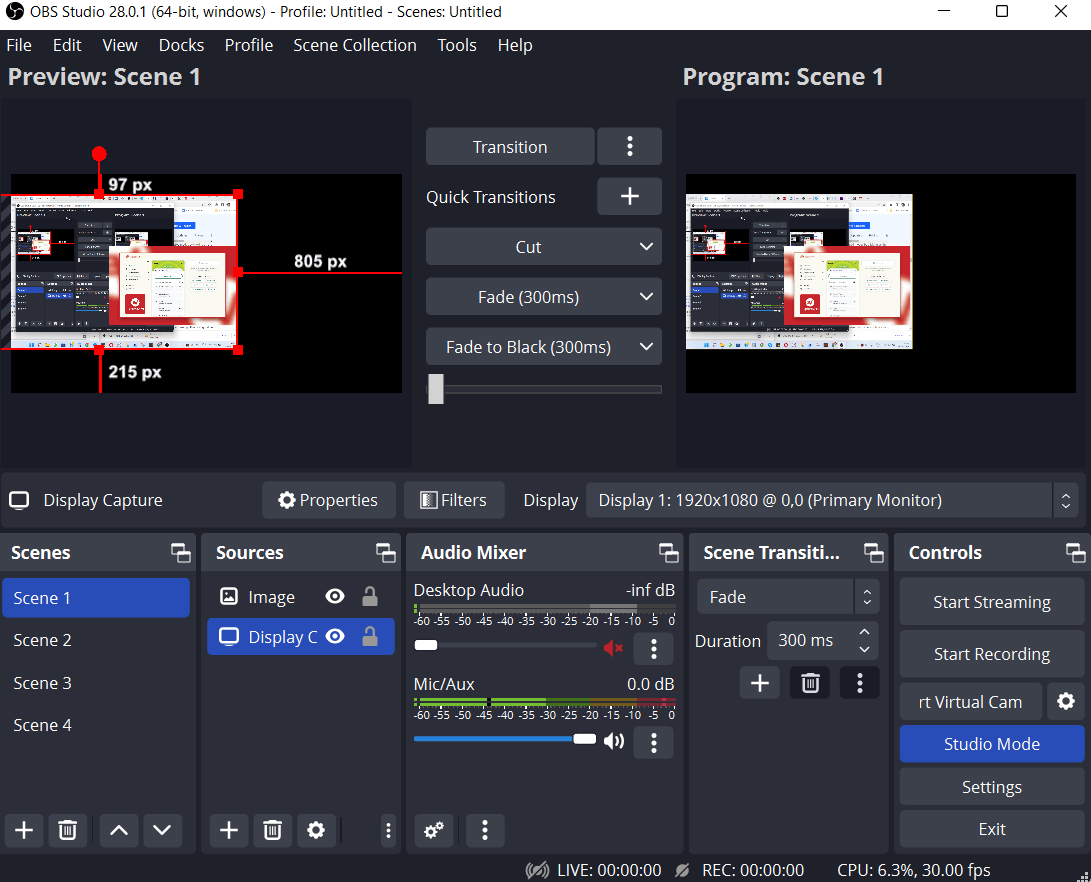
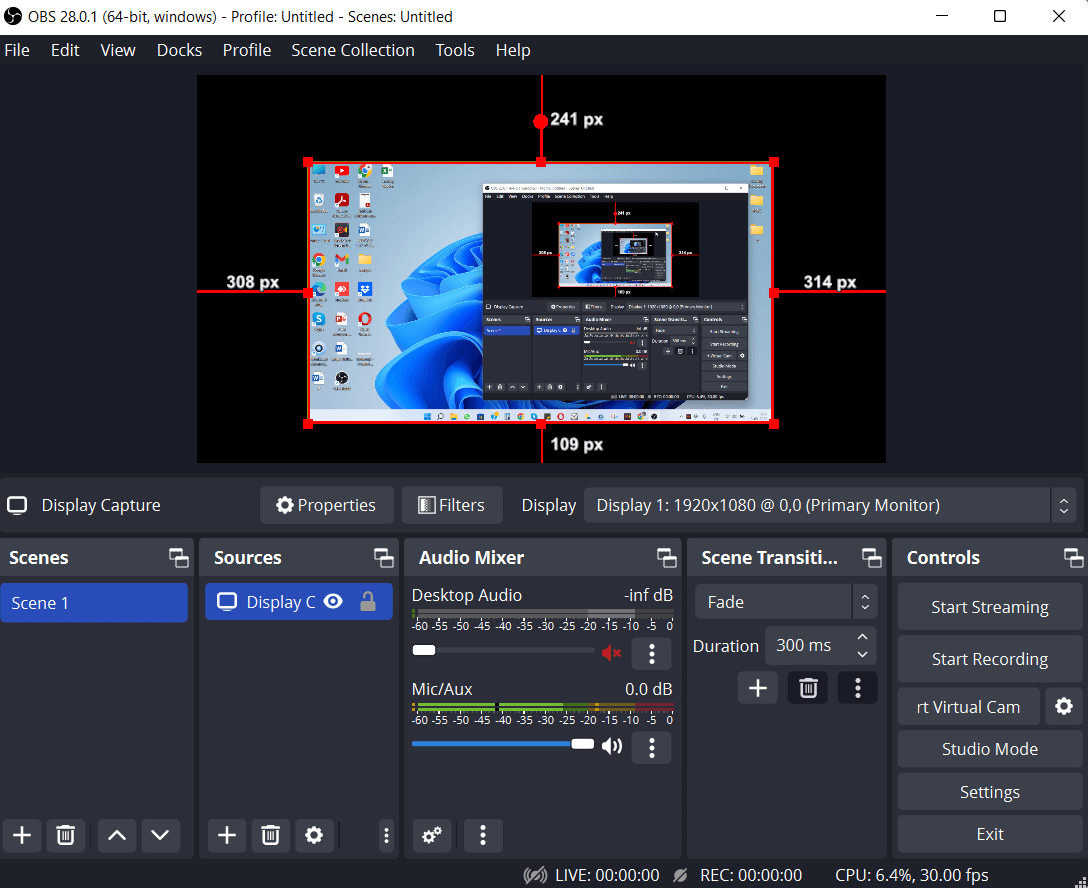
7. Now that you are all set to record the activities on your screen, move to the farthest right and click on the Start Recording button to initiate the recording process.
At any point, you can resize the screen that you are recording using the handles as shown in the screenshot below -
8. Once you are done recording, click on Stop Recording. To view the recording, click on File > Show Recordings, and you can access all the screen recordings.
How To Use OBS Studio To Capture A Part of Screen?
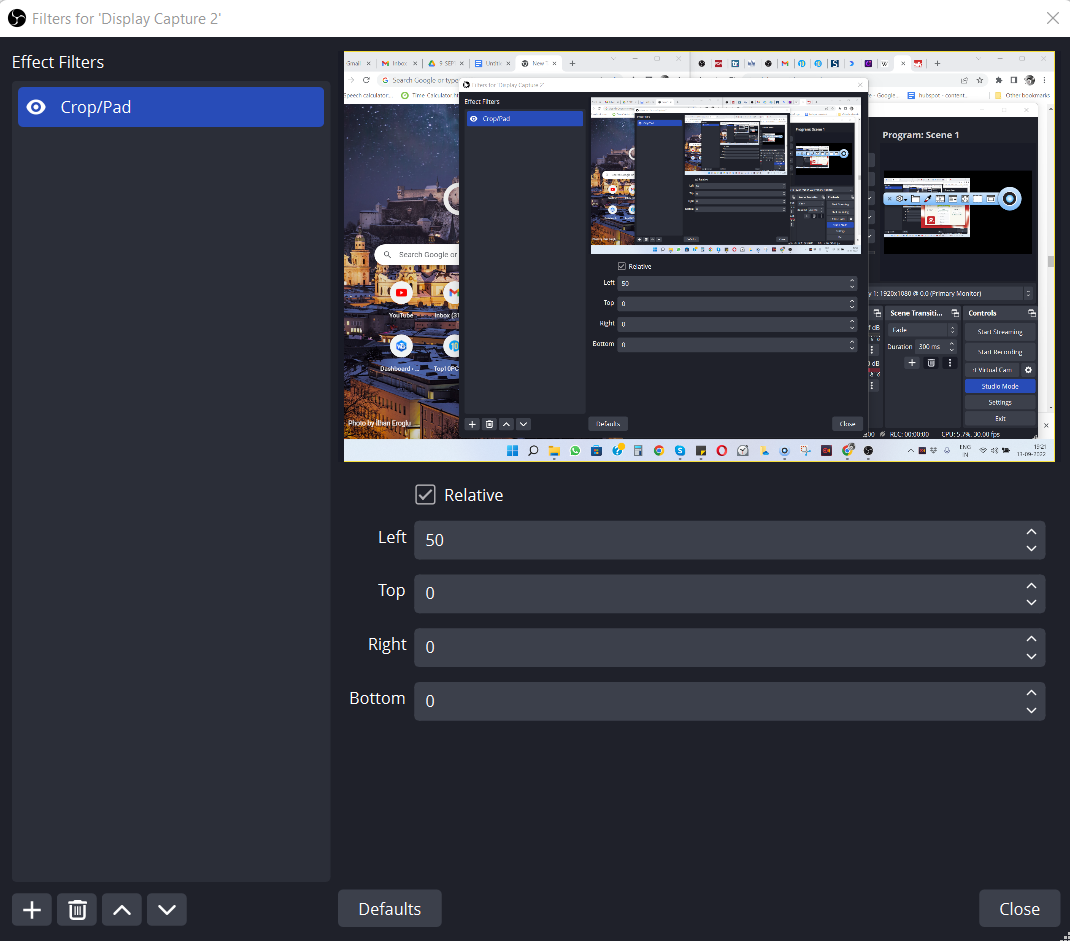
A complete Windows Capture isn’t exactly what you wanted? Wish to capture a part of the screen? You can use Crop/Pad filter, with the help of which you can isolate smaller parts of your display. Follow the steps mentioned below -
1. Head to the bottom where you can see Sources.
2. Click on +
3. Select Display Capture
4. Name your Capture and click on OK.
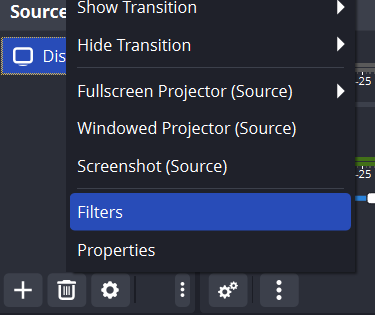
5. Right-click on your Display Capture and click on Filter
6. Add a Crop/Pad and adjust the settings as per your liking, i.e., the amount of cropping you want to do.
Frequently Asked Questions:
Q1. Is OBS Studio good?
All in all, OBS Studio is a great screen recording for screencasting and live-streaming games. Even though free and open source, it offers various features. You can set up multiple scenes, work with various transitions, edit audio and video on the go, and do much more.
Q2. Do professionals use OBS?
Professional broadcasters, gamers, and content creators use OBS studio to stream content on platforms such as YouTube, Instagram, Twitch, and numerous others because it helps mix and produce live content.
Q3. Is OBS Studio Safe for Windows?
Yes, OBS Studio is safe for Windows. First, it is open source, and you can see the programming code. Moreover, any changes to the code are promptly reviewed by contributors. As such, no one can add anything malicious. Second, it was not flagged off as malware by Windows Defender or any third-party Antivirus software after installation.
Q4. Does OBS have a watermark?
Unlike many other screen capture software, OBS Studio doesn't impose any watermarks on your screen recording. This helps you get a more professional screen recording or broadcast. You can add your watermarks.
Final Verdict
Suppose you have downloaded OBS screen recording software on your Windows PC. In that case, it's a win-win situation because now you can record your on-screen activities from various sources and easily broadcast them on different streaming platforms. If you are looking for alternatives to OBS Studio? Here are some of the best screen recording software for Windows PC.Try it and let us know about your experience in the comments section below. For more such content, keep reading Top10PCSoftware. You can also connect with us on Facebook, Pinterest, Twitter, and Flipboard.

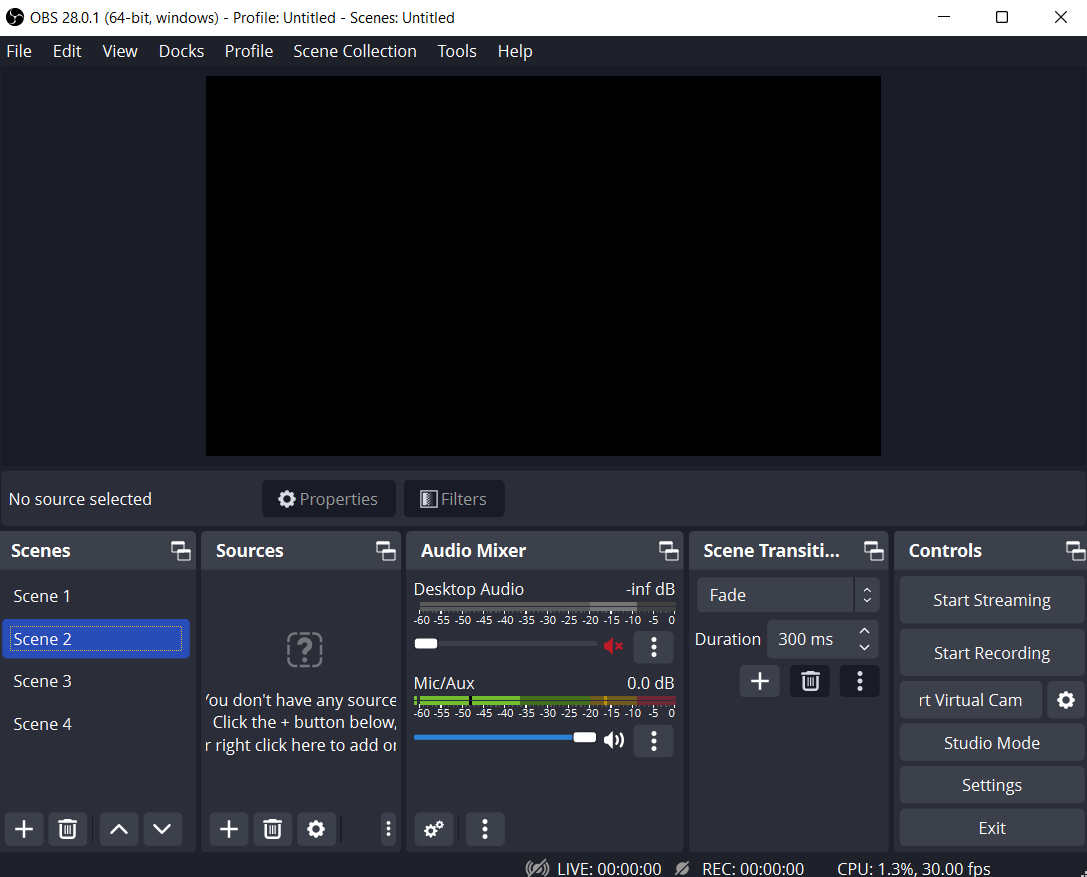 The user interface can be segregated into scenes, sources, audio mixers, scene transitions, and controls. After you have installed OBS Studio, you will first see a blank screen that can further be changed to various sources such as a display, gaming screen, browser, etc. OBS Studio also offers a Studio Mode where you can preview and stage elements before pushing them live to your audience.
At first glance, and especially if you are new to the concept of screen recording, OBS studio doesn't come across as very user-friendly. We are not saying that beginners shouldn't give OBS Studio a try; however, you can try the likes of
The user interface can be segregated into scenes, sources, audio mixers, scene transitions, and controls. After you have installed OBS Studio, you will first see a blank screen that can further be changed to various sources such as a display, gaming screen, browser, etc. OBS Studio also offers a Studio Mode where you can preview and stage elements before pushing them live to your audience.
At first glance, and especially if you are new to the concept of screen recording, OBS studio doesn't come across as very user-friendly. We are not saying that beginners shouldn't give OBS Studio a try; however, you can try the likes of 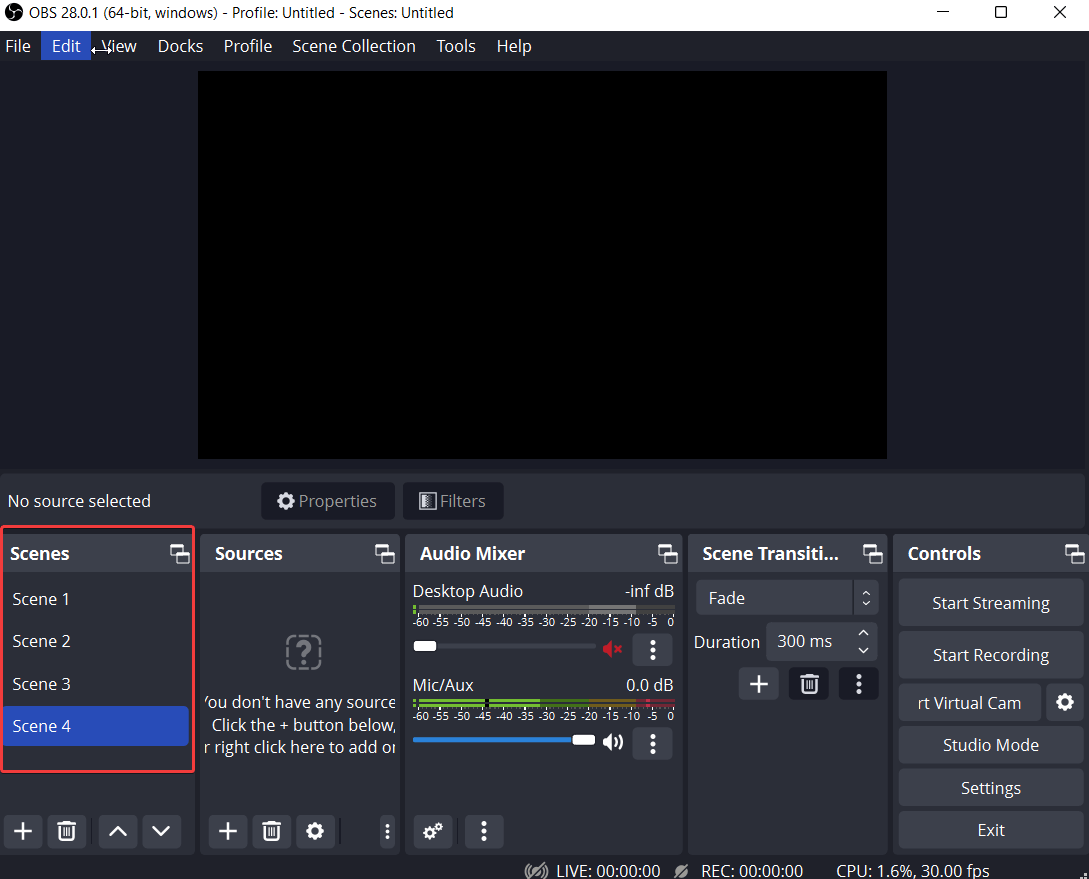 OBS Screen recorder lets you set up unlimited scenes. This enables to switch between scenes seamlessly. You can choose from a variety of transitions when switching between scenes. These include Fade, Cut, Swipe, Slide, Stinger, Fade to Color, and Luma Wipe.
 OBS Studio has almost no function that you cannot operate via a hotkey. And, you have the complete freedom of setting up hotkeys to juggle between various functions efficiently.
 This feature can be handy if you frequently conduct live streaming sessions, as it can give a more professional look to your live streams. The Studio Mode helps you stage the elements before you go live with these elements while you are broadcasting. These could be transitions, sources, or other elements. This way, you can save yourself from live streaming something you didn't intend to stream.
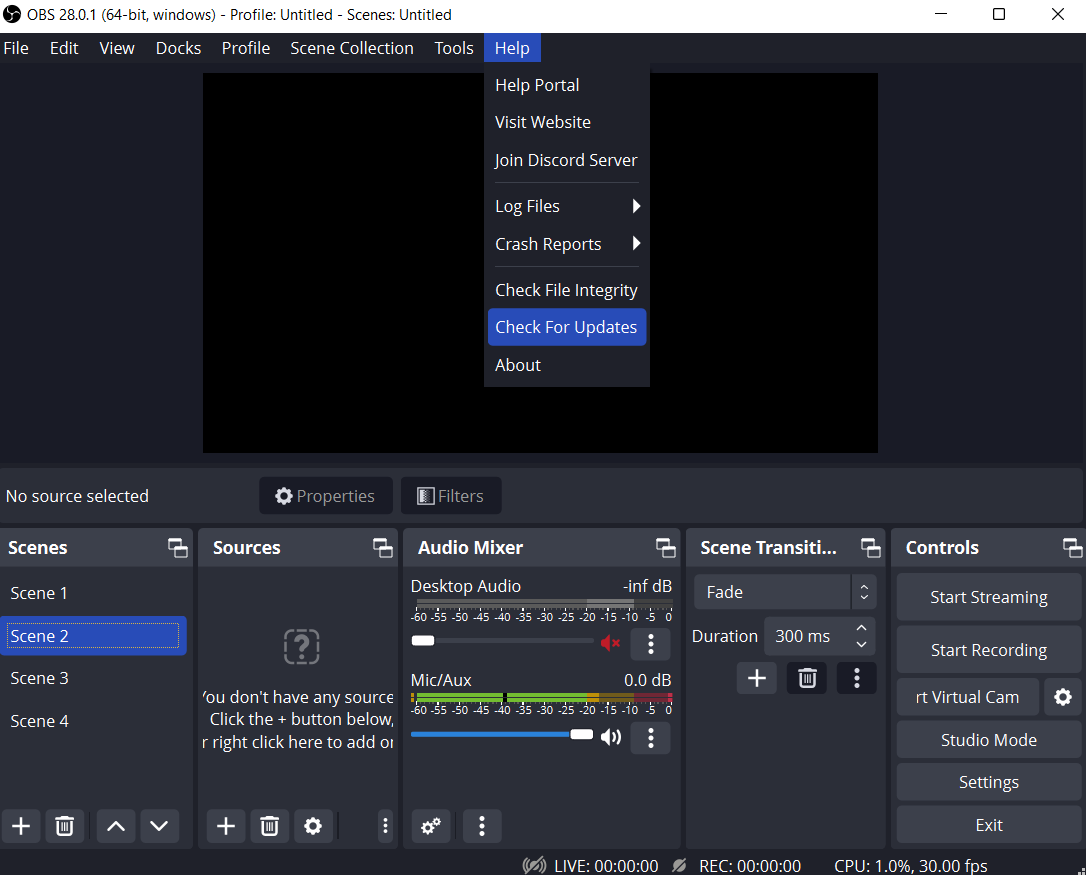 OBS Studio comprises one of the most active developers who continuously roll out updates to fix bugs and improve functionality. Since its inception in 2012, OBS Studio has undergone various updates, something that not even the best in the business have. Fetching updates manually is effortless. All you need to do is click on the Help menu and then click on Check for Updates, as seen in the screenshot below.
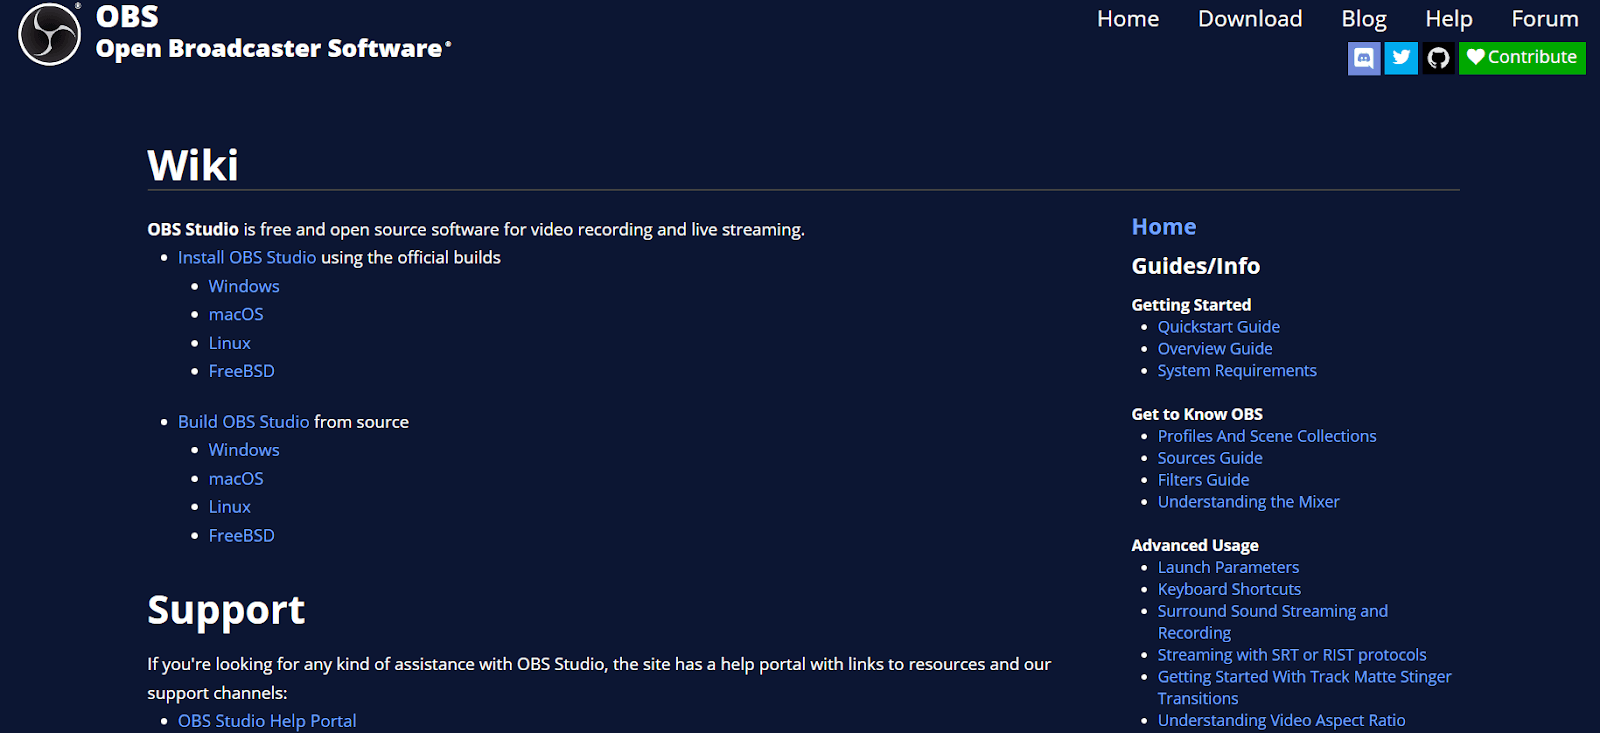 OBS Studio offers a variety of ways through which users can seek help in case of technical and other issues. You can visit the OBS Studio help page, where you can access guides that can help you with various functions of OBS Studio.
You can also chat with volunteer support members and OBS contributors and get your queries resolved. OBS Studio has a large community/ forum where you can post your feedback, discuss tools, etc. You can also install several great plugins and take your experience to the next level.
OBS Studio offers a variety of ways through which users can seek help in case of technical and other issues. You can visit the OBS Studio help page, where you can access guides that can help you with various functions of OBS Studio.
You can also chat with volunteer support members and OBS contributors and get your queries resolved. OBS Studio has a large community/ forum where you can post your feedback, discuss tools, etc. You can also install several great plugins and take your experience to the next level.
 2. In the Auto-Configuration Wizard, specify how you want to use the program and click Next.
 3. Set your audio - i.e., Desktop and Mic
4. Let’s get down to the bottom of the interface. First, you can set up multiple scenes by the activities you perform by clicking on the + - e.g., game streaming, capturing desktop activities, webinars, etc. The question arises, how do I capture the video?
5. Next, we are going to set up a source. Head to the Sources section, click on the + button from the bottom and choose from the activities or elements shown in the screenshot below. You could choose to capture your webcam by clicking on Video Capture Device as shown in the screenshot below or record all the activities on your display by clicking the Display Capture option, and so on.
6. In the case of Display Capture, you can even switch between multiple monitors (in case you are using more than one screen).
3. Set your audio - i.e., Desktop and Mic
4. Let’s get down to the bottom of the interface. First, you can set up multiple scenes by the activities you perform by clicking on the + - e.g., game streaming, capturing desktop activities, webinars, etc. The question arises, how do I capture the video?
5. Next, we are going to set up a source. Head to the Sources section, click on the + button from the bottom and choose from the activities or elements shown in the screenshot below. You could choose to capture your webcam by clicking on Video Capture Device as shown in the screenshot below or record all the activities on your display by clicking the Display Capture option, and so on.
6. In the case of Display Capture, you can even switch between multiple monitors (in case you are using more than one screen).
 7. Now that you are all set to record the activities on your screen, move to the farthest right and click on the Start Recording button to initiate the recording process.
 At any point, you can resize the screen that you are recording using the handles as shown in the screenshot below -
 8. Once you are done recording, click on Stop Recording. To view the recording, click on File > Show Recordings, and you can access all the screen recordings.
 4. Name your Capture and click on OK.
5. Right-click on your Display Capture and click on Filter
4. Name your Capture and click on OK.
5. Right-click on your Display Capture and click on Filter
 6. Add a Crop/Pad and adjust the settings as per your liking, i.e., the amount of cropping you want to do.