Pros:
- Multi-thread support
- Supports data sanitization methods that are approved by National Security Agency or NSA
- Doesn’t hog on resources
Cons:
- A little complicated interface
Copying files from one place to another may seem like a normal task but what if you have to copy multiple large files? Moreover, what if there are problematic files? Can you afford to check the copying process every now and then? Would you be fine with a slow copy-pasting process? If not, do you need file copy software? Here we are going to review FastCopy which is regarded as one of the best copy/ backup software on Windows.
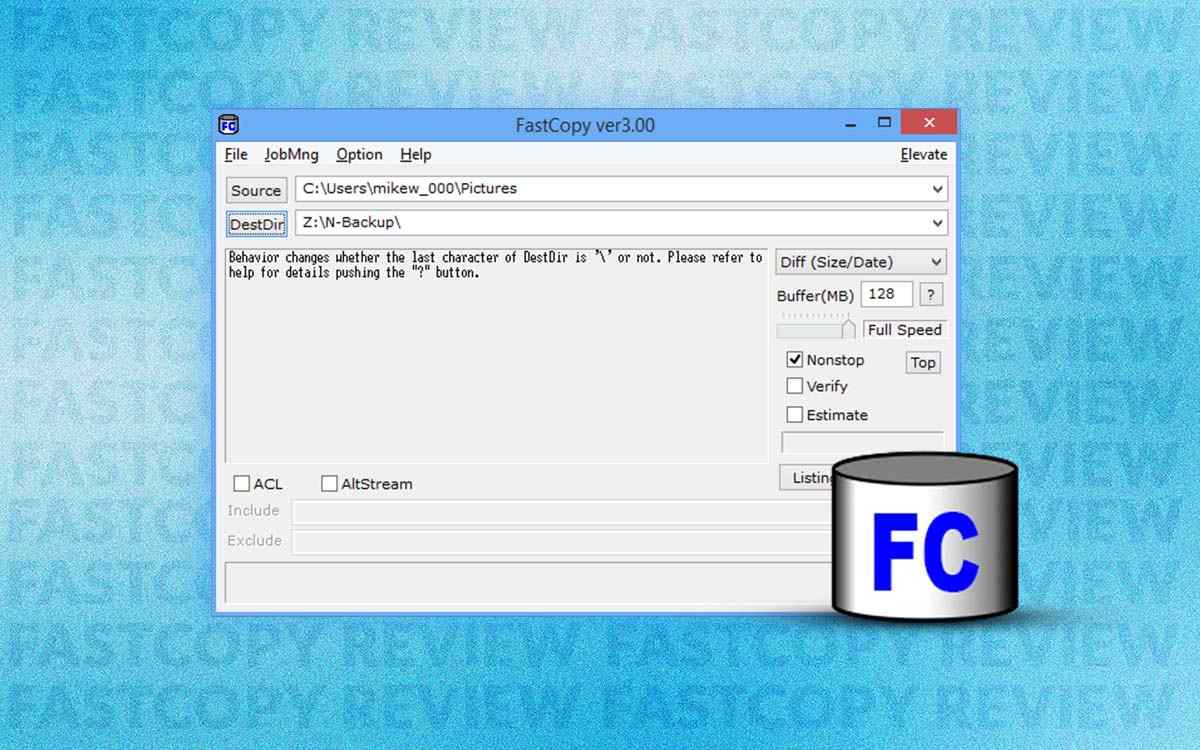
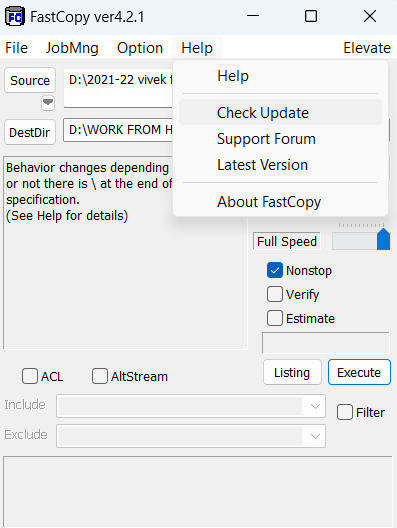
 FastCopy has a very basic interface. On the top, you have the menu bar that contains options for File management, task management (JobMng), and options for post-processing. Here you can also refer to the “Help” menu to understand what each of the functions of the software is meant to do.
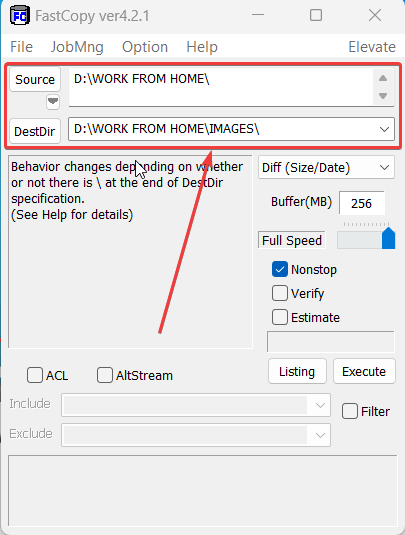
Then, in the next section, you can choose the “Source” and the “Destination” directory for file transfer. Here you can add further filters to overwrite or sync files based on size and date. In the middle area, you can also see information regarding the read and write speed, file rate, and transfer rate.
For the most part, the interface is basic and easy to understand. However, there are certain options that, though powerful, are meant only for advanced users only.
FastCopy has a very basic interface. On the top, you have the menu bar that contains options for File management, task management (JobMng), and options for post-processing. Here you can also refer to the “Help” menu to understand what each of the functions of the software is meant to do.
Then, in the next section, you can choose the “Source” and the “Destination” directory for file transfer. Here you can add further filters to overwrite or sync files based on size and date. In the middle area, you can also see information regarding the read and write speed, file rate, and transfer rate.
For the most part, the interface is basic and easy to understand. However, there are certain options that, though powerful, are meant only for advanced users only.
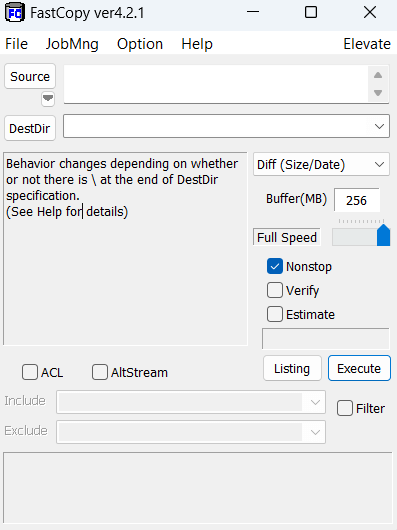
 You can copy and paste files from the source to the destination by simply dragging and dropping the path in the “Source” or the “Destination” section. Alternatively, you can click on the buttons of the same names and choose files that you want to copy.
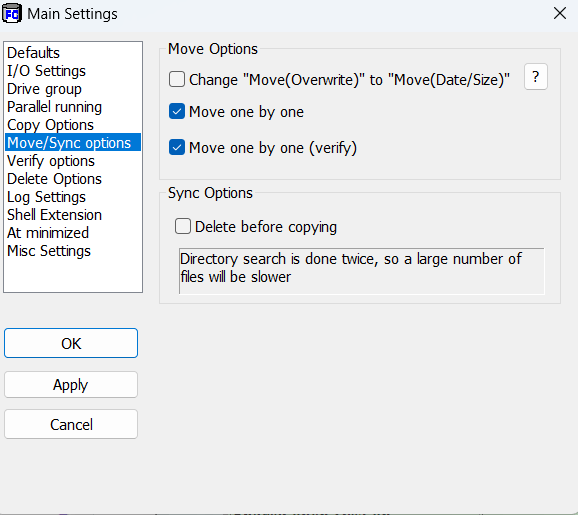 FastCopy offers you several options to move and sync files. For instance, you can choose to move files one by one. When this option is selected, your original files won’t get deleted until the move files list is full. Or, you can choose to delete files before copying. Here, the files that don’t exist in the source or overwrite destination files will be deleted before the copying process begins.
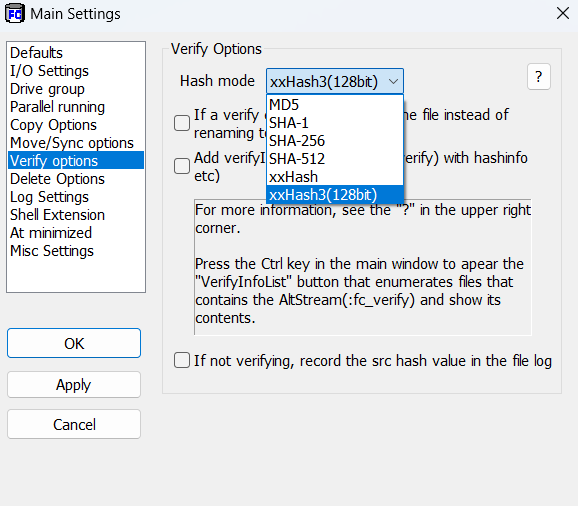 You can use FastCopy to verify files using a variety of options. For example, from the “Main Settings” you can choose the Hash Mode (xxHash/MD5/SHA-1/SHA-256/xxHash3) or any of the mentioned options as shown in the screenshot above.
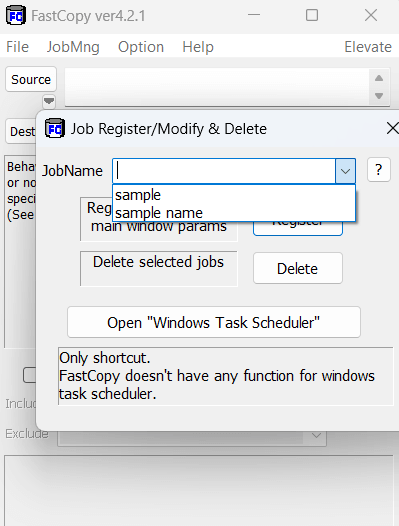 You can create separate jobs to copy files. Under each job, you can have individual parameters for “Source”, Destination directory or “DestDir”, buffer speed, and other settings. You can manage each of these jobs under the “JobMng” section on the top. Under this section, you can even delete a selected job.
 You can also drag and drop file paths onto the source and destination.
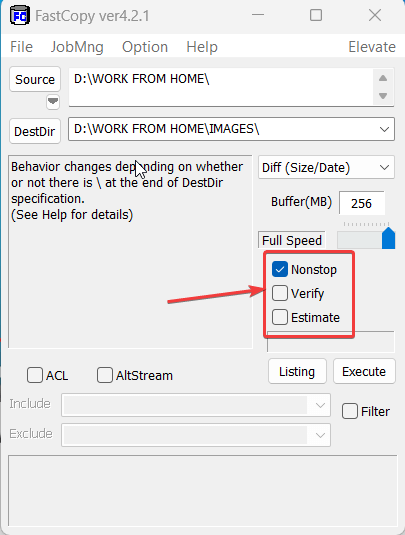
3. You can also click on the checkboxes on the right if, for instance, you want FastCopy to verify the data for you or estimate the transfer time.
You can also drag and drop file paths onto the source and destination.
3. You can also click on the checkboxes on the right if, for instance, you want FastCopy to verify the data for you or estimate the transfer time.
 4. If you are copying files between servers then you can click on the ACL checkbox, this will copy the access control list.
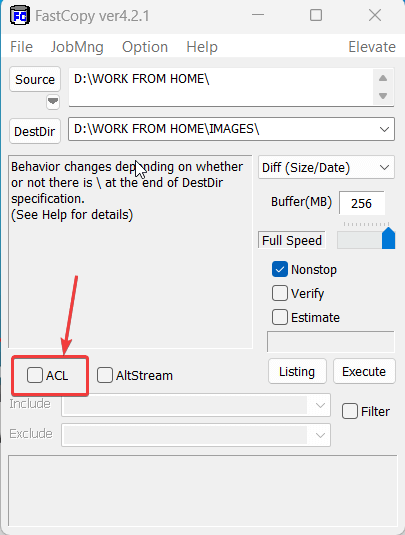 5. Once you are satisfied with the options you have chosen, click on the Execute button.
6. While the transfer is taking place, you can minimize the tool and continue other tasks. To access the tool again, you can click on the FastCopy icon from the System Tray.
5. Once you are satisfied with the options you have chosen, click on the Execute button.
6. While the transfer is taking place, you can minimize the tool and continue other tasks. To access the tool again, you can click on the FastCopy icon from the System Tray.